Accessing NordLayer
NordLayer is the VPN we use to give you secure, encrypted access to your organisation's network and the internet, whether you are in the office, at home, or working away. This guide walks you through accepting your invitation, installing the app, signing in, connecting, and a few useful settings.
If anything in this guide does not match what you see on screen, or you get stuck at any point, contact the service desk and we will help you through it.
Accept your invitation
You will receive an invitation email from NordLayer asking you to join your organisation. To get started:
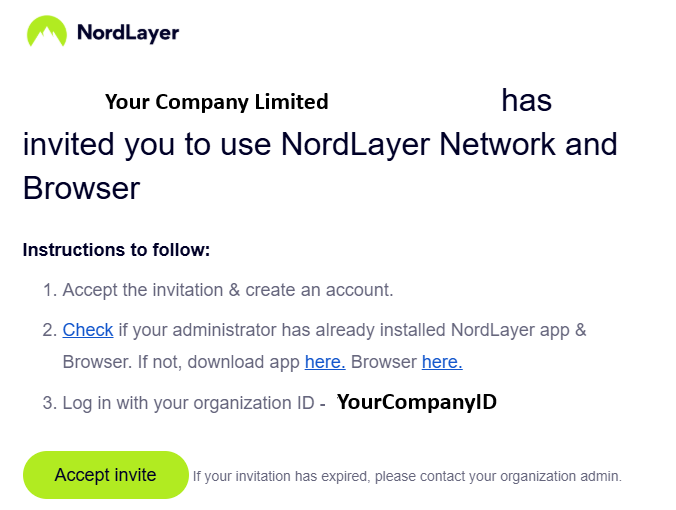
- Open the invitation email and click Accept invite.
- Accept the invitation and create your account.
- Make a note of your Organization ID, shown in the email. You will need this every time you sign in.
Download and install the app
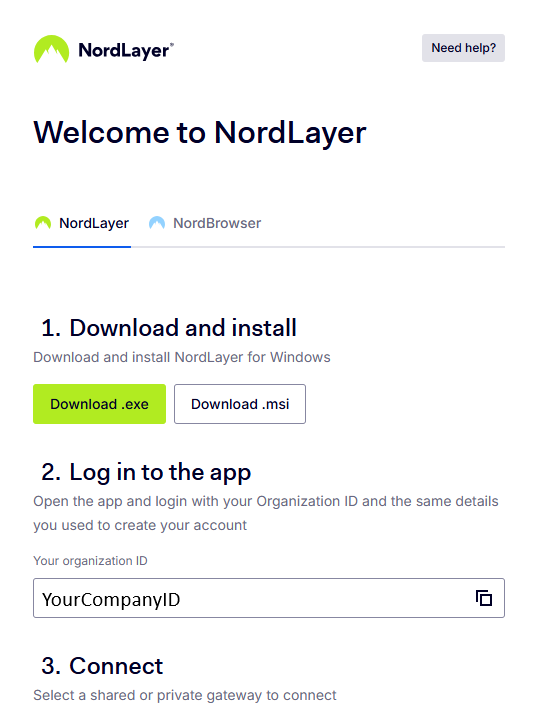
NordLayer is available for Windows, macOS, Android, iOS, and Linux. You can download the app for any platform from https://nordlayer.com/download/.
NordLayer runs as a small app on your device. On most company-managed devices the app is deployed for you automatically, so check whether it is already installed before downloading anything.
- Company-managed devices - the app is usually already installed by us. Look for the NordLayer icon in your system tray or applications before downloading.
- Personal or unmanaged devices - if the app is not present, download it from the link in your invitation email, or from the official download page.
On Windows you can choose either the .exe or .msi installer. Either is fine for a personal device; pick .exe if you are unsure.
Open the app and sign in
Once the app is installed:
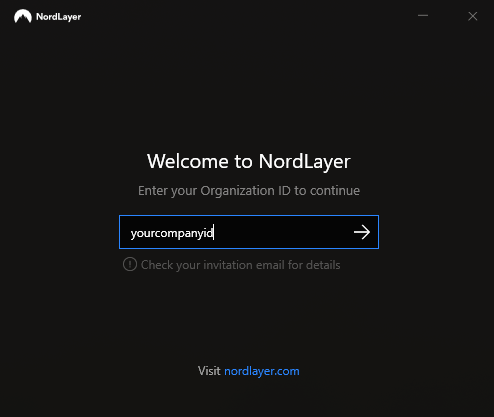
- Open the NordLayer app.
- Enter your Organization ID (from your invitation email) and continue.
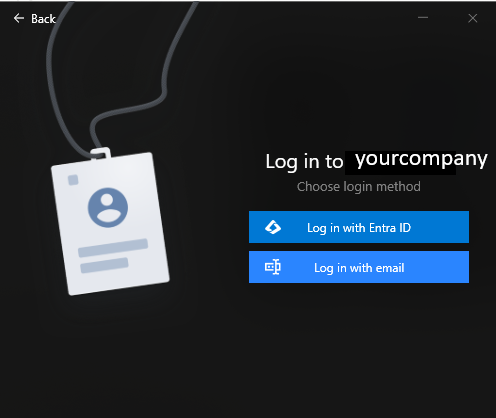
- Choose your login method:
- Log in with Entra ID if you use SSO - this will sign you in using your company Microsoft 365 account.
- Log in with email if you set up a username and password.
- Complete sign-in and approve any multi-factor authentication prompt if asked.
Connect to the network
After signing in you will see a list of available gateways, shown as countries (for example Ireland, United Kingdom, Netherlands, Belgium, France).
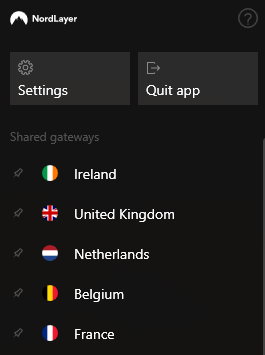
- Click the gateway you want to connect to. For most users this will be United Kingdom unless you have been told otherwise.
- Wait a moment while the connection establishes.
- You will see a green Connected status with the gateway name once you are protected.
When you see the green tick and "Connected", your traffic is encrypted and you have secure access to your organisation's resources.
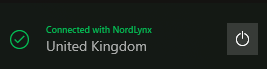
To disconnect, click the power icon next to the connection status.
Useful settings
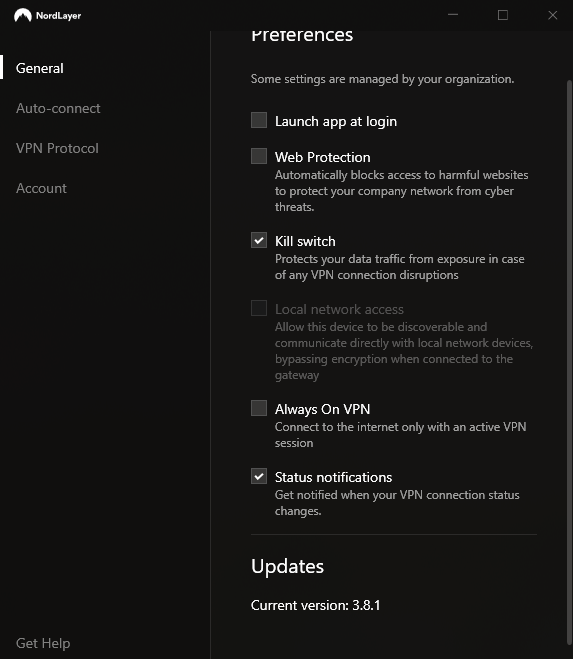
You can open Settings from the main app window. A few options are worth knowing about. Note that some settings are managed centrally by your organisation and may be locked.
Launch at login and Always On VPN
Under General:
- Launch app at login - opens NordLayer automatically when you sign in to your device, so it is always ready.
- Kill switch - protects your traffic if the VPN connection drops unexpectedly. We recommend leaving this on.
- Always On VPN - only allows internet access when there is an active VPN connection, for maximum protection.
Auto-connect
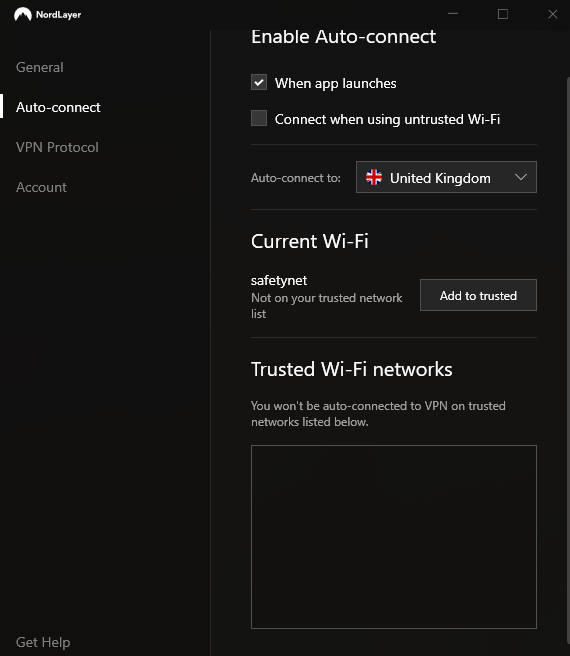
Under Auto-connect you can have NordLayer connect for you automatically:
- When app launches - connects as soon as the app opens.
- Connect when using untrusted Wi-Fi - automatically connects whenever you join a network that is not on your trusted list (for example a coffee shop or hotel).
- Auto-connect to - choose which gateway to connect to automatically (for example United Kingdom).
- Trusted Wi-Fi networks - networks you add here (such as your home or office Wi-Fi) will not trigger an automatic connection.
Getting help
If you have any trouble accepting your invitation, signing in, or connecting, contact the Safetynet IT service desk and we will be happy to help.