Outlook
- Amend Distribution Group
- Create a new Outlook profile
- Outlook - Using Equipment and Room mailboxes to create meetings.
- Set email redirects in classic Outlook Web Access
- Adding a shared calendar in Outlook
- Creating an Out of Office or setting up a forward
- Add a sharedmailbox in as a "full mailbox" (New Outlook)
- Auto-Expanding Archive (Exchange Plan 2)
Amend Distribution Group
Add or remove recipients to a distribution group.
1. In Outlook Open the address book
Either press CTRL + SHIFT + B
OR
Go to Contacts in the bottom left

Select Address Book in the top right.

2. Edit your distribution list:
In the Address Book find the list you wish to edit > Right Click > Properties.

Choose Modify > Add or Remove depending on if you are adding or removing members.

You can either highlight members and hit Remove to remove them or if you are choosing "Add.." a prompt will appear for you to select which users to add in.
If you hit any errors at this point OR anything is grayed out you may not be the owner of this group, in which case please request to support@safetynet-it.com to be added in.
Create a new Outlook profile
Make sure Outlook is closed
hold shift on your keyboard and click the Outlook Icon - You can either do this from the Task bar or search for it in the Start Menu


You will then be prompted to create a new profile - Choose options then New... > Then type in a profile name, this can be anything e.g "outlook" or "my email".

Sign in with your email details i.e username/password and choose connect

Make sure to choose your new profile from the drop down list and set as the default profile, else you will not automatically log into that profile on re-launch outlook.

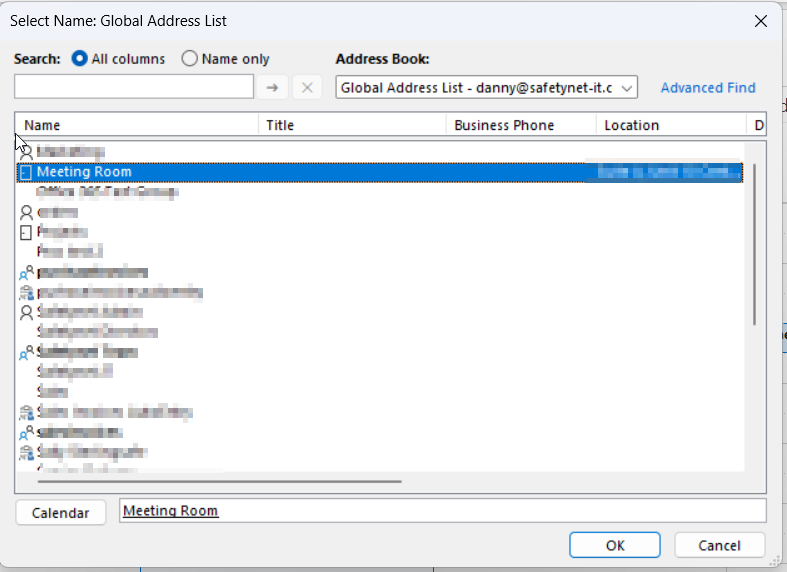
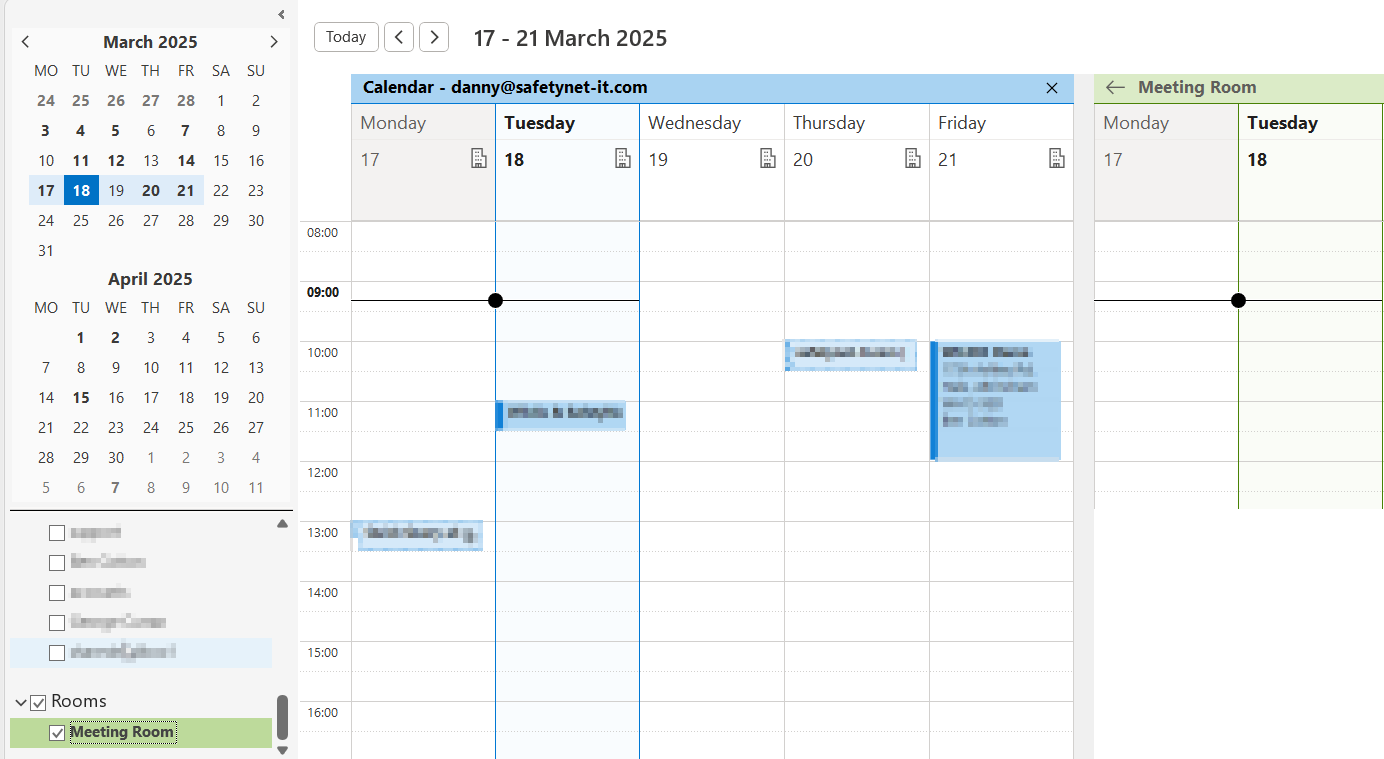
Outlook - Using Equipment and Room mailboxes to create meetings.
In Outlook go to Calendars > New Meeting

In the dialogue that appearschoose Rooms...

You will be shown a list of rooms or equipment bookable in your business, double click on the one required and then press OK

Choose a time and date and then hit Send.
You can see the room availability in the bottom right "Suggested times:" area. The event will then show in your own and the calendar of the room/equipment.

Set email redirects in classic Outlook Web Access
It's very easy to manage your own email redirects for when you're out of the office, or on holiday without having to raise a ticket to us.
Open a web browser and go to https://mail.indupart.co.uk/owa and login with your usual username and password in the format indupart\username, as shown in the image below:

Once logged in, click on the gear wheel icon to access the dropdown menu and select 'Options'

Adding a shared calendar in Outlook
Adding a Shared Mailbox (New Outlook)
1. Go to your Calendars in Outlook.
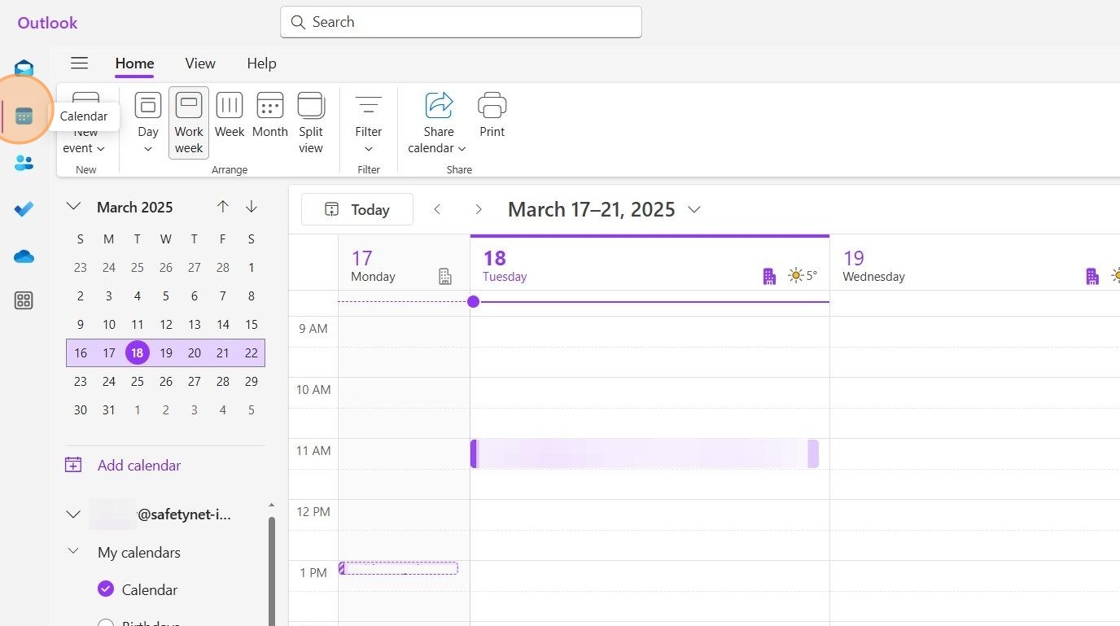
2. Click "Add calendar".

3. Choose "Add from directory".

4. Select your mail account from the dropdown menu.

5. Search for the calendar you need access to.
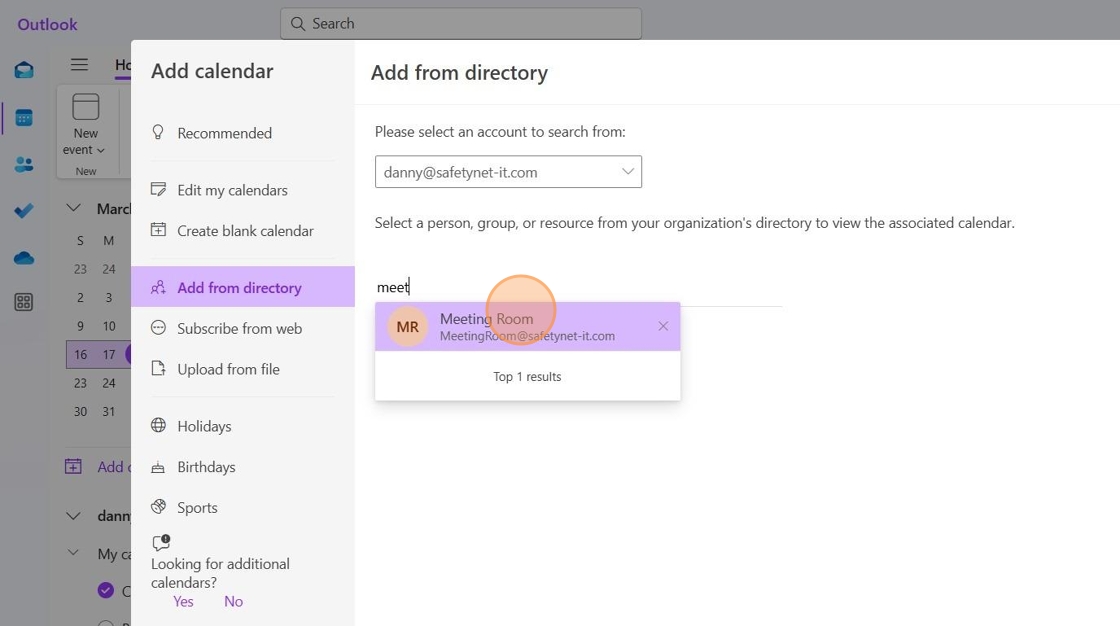
6. Once selected, click "Add" to confirm.

7. The selected calendar will now appear under Other Calendars. Ensure it is ticked so it shows in your list of active calendars.

8. If you receive an error when adding a calendar stating that you do not have permission, please raise a support request at support@safetynet-it.com for assistance. This suggests you do not have access permissions.

Adding a Shared Mailbox (Classic Outlook)
1. Go to your Calendars.
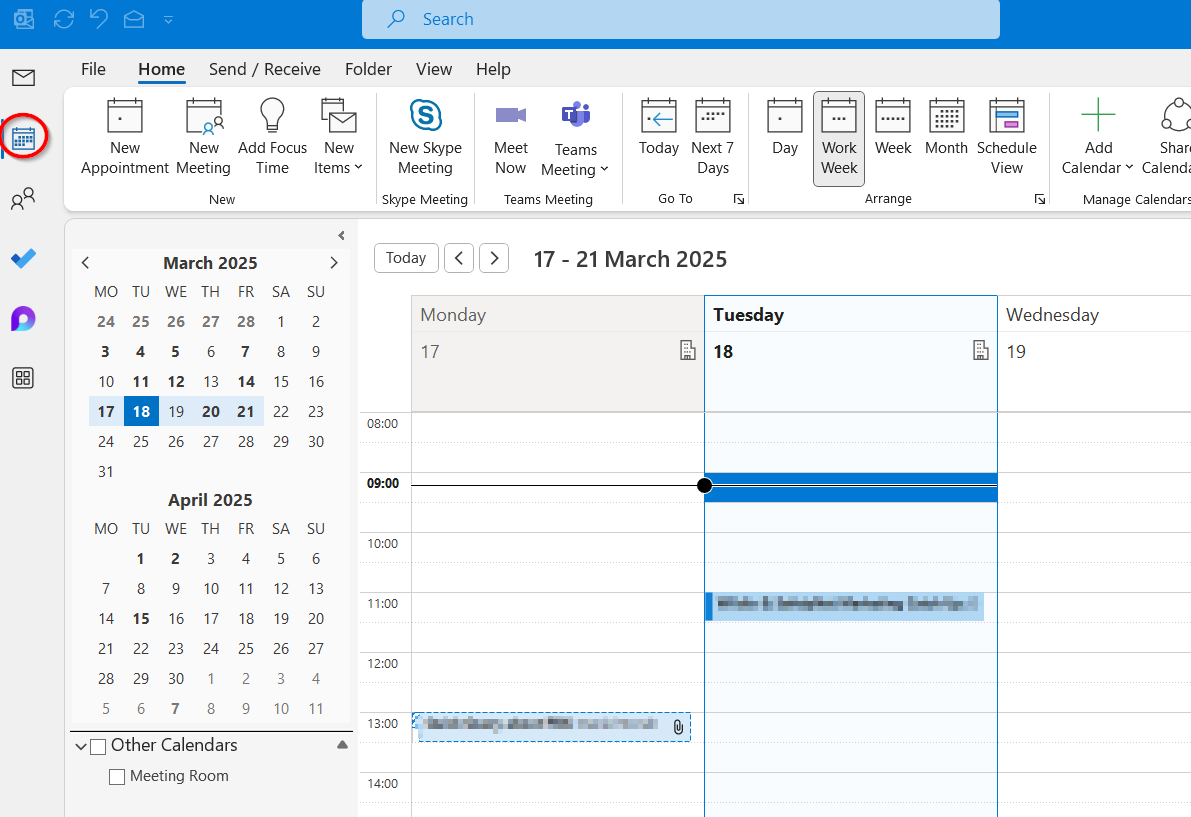
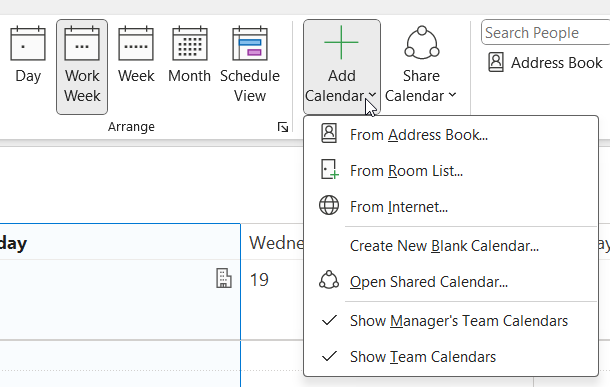
2. Click "Add Calendar" in the ribbon and choose "From Address Book".
3. Find the mailbox you need access to, double-click on it, and press "OK".
4. The calendar should now appear in your list. Ensure it is ticked so it shows in your Active Calendars.
Adding a Shared Mailbox (New Outlook on Mac OS)
1. On the File menu, point to Open, and select Other User's Folder...
2. In the Folder Type list, choose Inbox, Calendar, or Address Book.
- Note: In the new Outlook for Mac, you can only choose calendar.
3. In the Search box, type the name of the person who granted you access, select the person's name in the search results, and choose Open.
Creating an Out of Office or setting up a forward
Guide: Setting Out of Office and Forwarding in Outlook
This guide explains how to set up an Out of Office (automatic reply) and enable email forwarding in both Outlook (classic desktop app) and Outlook (new version / web-based).
Outlook (Classic Desktop App – Office 365 / 2019 / 2016)
1. Set Out of Office (Automatic Replies)
1. 1. Open Outlook.
2. 2. Go to the File tab (top left).
3. 3. Select Automatic Replies (Out of Office).
4. 4. Choose 'Send automatic replies'.
5. 5. Optionally, set a Start time and End time.
6. 6. Enter your message in the Inside My Organization tab (for colleagues).
7. 7. Enter your message in the Outside My Organization tab (for external contacts).
8. 8. Click OK.
2. Set Email Forwarding
9. 1. Open Outlook.
10. 2. Go to the File tab.
11. 3. Click Manage Rules & Alerts.
12. 4. In the Rules and Alerts window, click New Rule.
13. 5. Under 'Start from a blank rule', select 'Apply rule on messages I receive'.
14. 6. Click Next (leave conditions blank if you want it to apply to all).
15. 7. In Step 2, check 'forward it to people or public group'.
16. 8. Click the underlined link 'people or public group' and select or type the forwarding email address.
17. 9. Click Finish, then Apply.
18. 10. Click OK to save.
Outlook (New – Web & New Windows/Mac App)
1. Set Out of Office (Automatic Replies)
19. 1. Open the new Outlook (or go to outlook.office.com).
20. 2. Click the Settings (gear) icon at the top right.
21. 3. Select Mail → Automatic replies.
22. 4. Turn on Automatic replies.
23. 5. Optionally, set a time range.
24. 6. Enter your reply message.
25. 7. Choose if replies should go to internal or external contacts.
26. 8. Click Save.
2. Set Email Forwarding
27. 1. Open the new Outlook.
28. 2. Click the Settings (gear) icon at the top right.
29. 3. Select Mail → Forwarding.
30. 4. Turn on 'Enable forwarding'.
31. 5. Enter the email address where you want messages forwarded.
32. 6. Optionally, check 'Keep a copy of forwarded messages'.
33. 7. Click Save.
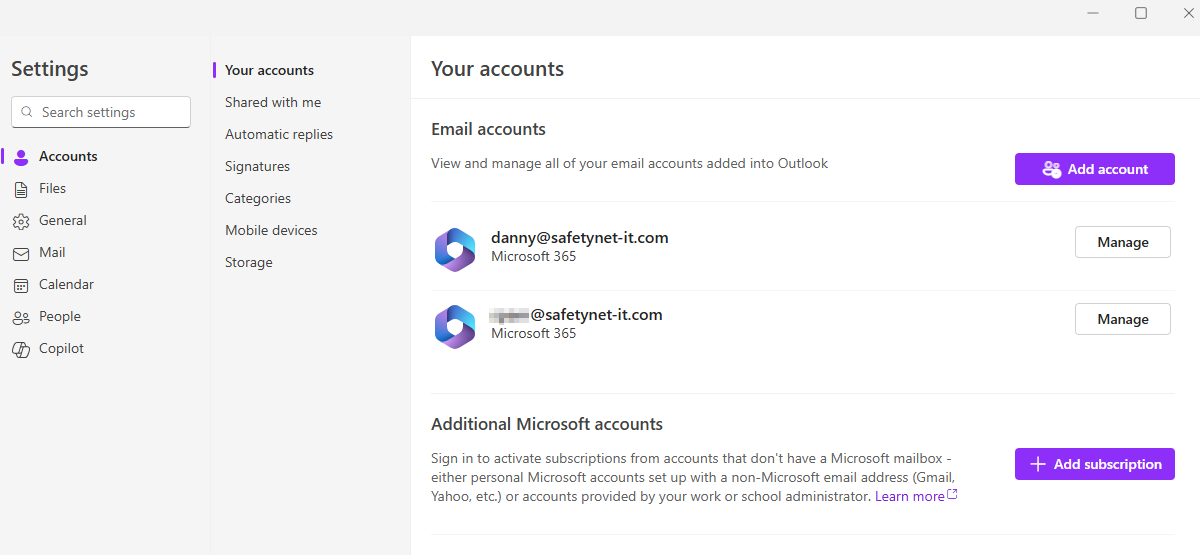
Add a sharedmailbox in as a "full mailbox" (New Outlook)
If you have access to a shared mailbox but need it to behave as a full mailbox (e.g have access to it's settings, signatures etc...) you can do so in the New Outlook Experience.
Click the settings cog
Then under Accounts > Shared with me
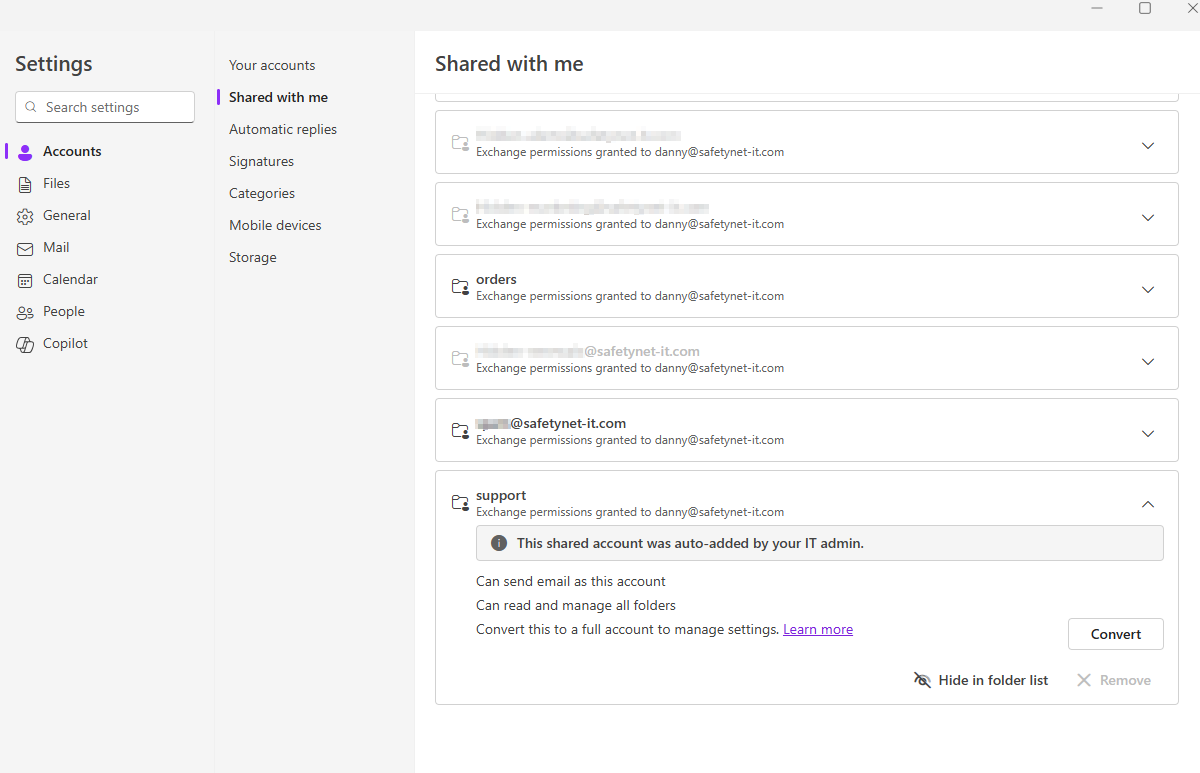
You can show/hide mailboxes here as well as choose Convert next to any mailbox to convert it to a full mailbox, with access to it's settings and signatures.
After a restart of Outlook you can see it now behaves as if added in via username/password.
Auto-Expanding Archive (Exchange Plan 2)
A full guide to this process can be found here - https://learn.microsoft.com/en-us/purview/enable-autoexpanding-archiving
USER MUST HAVE EXCHANGE ONLINE PLAN 2 LICENCE BEFORE COMPLETING THESE STEPS
The steps have to be done in order or this won't work
Most clients have predefined retention policy's but if you need to create a new one, follow this guide: https://learn.microsoft.com/en-us/exchange/security-and-compliance/messaging-records-management/create-a-retention-policy
STEPS TO COMP
Step 1: - Head to office 365 admin tenant & access Exchange Admin Centre
Step 2: Turn on In-Place Archive for the affected user and call it "(User's name) Archive" (This is under Mailbox in the user settings in exchange)
Step 3: Open Powershell and run - Connect-ExchangeOnline then log in with appropriate 365 tenant admin account
If you can't run Connect-ExchangeOnline - try these:
https://learn.microsoft.com/en-us/powershell/module/microsoft.powershell.security/set-executionpolicy?view=powershell-7.5 (set execution policy unrestricted)
https://learn.microsoft.com/en-us/powershell/exchange/connect-to-exchange-online-powershell?view=exchange-ps (Import exchange module)
Step 4: Once logged in, run the command Enable-Mailbox "User Email Address" -autoexpandingarchive
Step 5: Confirm with the user how long they want before archiving takes place (typically 2 years, will need to create a new retention policy for longer)