Managing phonebooks
How to Add or Edit a Contact in Your x-bees Phonebook
This guide shows you how to add a new contact, or update an existing one, in your Wildix x-bees phonebook. Once saved, the contact will be available in x-bees and on any phone you are logged into, including your desk phone.
Applies to: Wildix x-bees (desktop app and web app)
Step 1: Open x-bees
Open the x-bees desktop app, or go to https://app.x-bees.com in your web browser and sign in.
Step 2: Go to Your Phonebooks
- Select Contacts from the menu.

- Select Phonebook.

- At the top of the page, use the drop-down menu to choose which phonebook you want to work in.



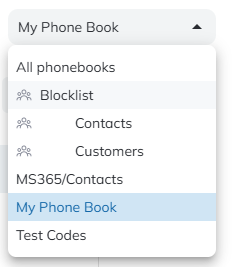
Step 3: Add or Edit a Contact
To add a new contact: select New contact.

To edit an existing contact: select the contact from the list, then select the pencil icon.

If you cannot add or edit a contact, you may not have permission to make changes to that shared phonebook. Please contact the Safetynet IT Service Desk and we will be happy to help.
Step 4: Enter the Contact's Details
Fill in the contact's name and phone number(s).
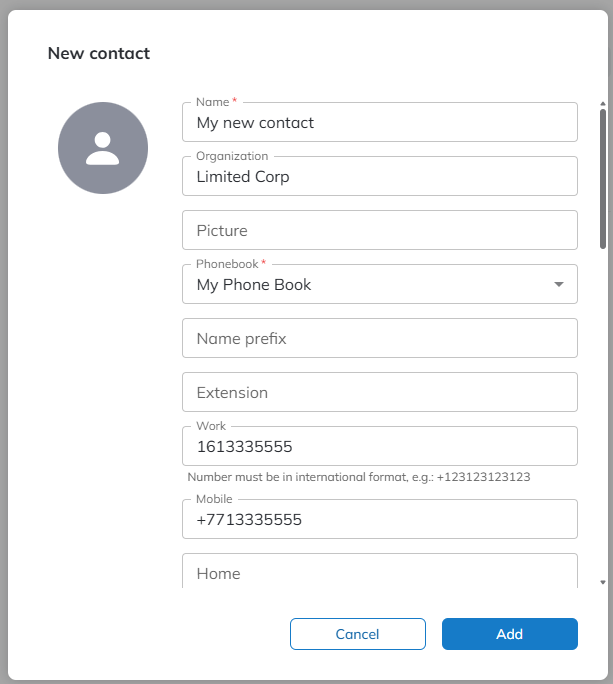
Phone numbers must be entered in international (E.164) format. This means:
- Start with +44 (the UK country code)
- Remove the leading 0 from the number
- Do not include any spaces, brackets or dashes
| Number type | How you might normally write it | How to enter it in x-bees |
|---|---|---|
| Landline | 0161 555 6666 | +441615556666 |
| Mobile | 07712 345678 | +447712345678 |
Then hit Add to finish
Your contact will now appear in your x-bees contacts, and on any phone you are logged into, including your desk phone.
Need help?
If you have any questions or run into problems, please contact the Safetynet IT Service Desk and a member of the team will be happy to assist.